Attempt this project at your own risk.
Raynor and GBO are in no way responsible for the out-come. We're not responsible for any mess-ups, deaths, injuries, ect.
I know it sounds harsh, just making sure you realize that using any of this info means you're on your own. These pics and info are simply how I honed my triggers. I'm sure there are other ways, but this worked well on mine. If you follow the instructions your end results will be a trigger that is smooth as glass with no creep and breaks clean.
Take your time, if anyone gets the pull weight down too low its from taking off to much material. Keep putting the trigger assembly back in the frame and check it many time during the honing.
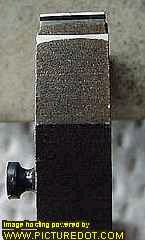
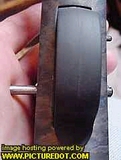
The hardest part of the job is getting the pins out. They either need to be pressed or driven out with a punch. I use aluminum or brass punches, so not to mark the frame if it drifts off the pin. They need to be driven out from the right side to the left like in the pic below.
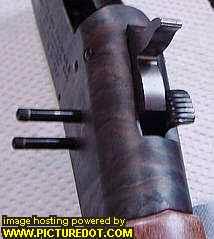
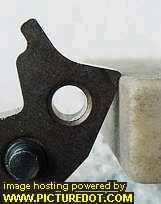
The pins are spined on one end and will only press out in one direction. The pic only show 2 pin press out, actually 3 need to be removed. There's a small pin that holds the front of the trigger assembly that need removing before the assembly will drop out.
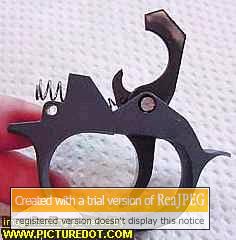
Here's the trigger assembly as it looks coming out of the frame.
The next pic shows the return spring after it has been cut down. I use a dremel tool with cut off wheel for cutting down the spring.

Here's the trigger on a hard Arkansas stone, hone it just like it is there. I keep two surfaces touching the stone to make sure the catch stays square, you can see in the pic what I'm talking about. Don't take a lot off, just enough to clean up the edge and make it square. Honing this part has nothing to do with the pull weight, just makes it smoother, less creep.
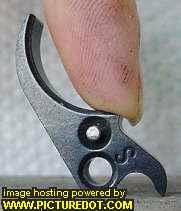
Here's a pic of the hammer being honed, again keep 2 bearing surfaced to make sure the sear stays square.
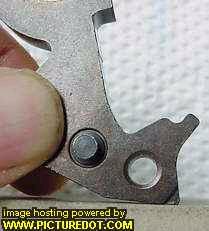
This is a different angle of the hammer sear, after it has been honed. Look close and you can see what I mean about 2 bearing surfaces while honing. Honing this part is what will determine your pull weight. The more you take that sear down the lighter your pull weight will be. Go slow, a little at a time and put everything back together and try it. Often, Often, Often. It's hard to put material back on, so go slowly on this part.
Use a new stone with nice sharp corners, hard Arkansas again, and lightly touch up the leading edge like this. Again be real careful, nothing to hold you square here so just lightly clean this area up. This is the area that makes the smoothness, or glass on glass feel or where the creep feel will come from if it's rough. I actually used a hard marble stone here with a super sharp corner and used very little pressure.
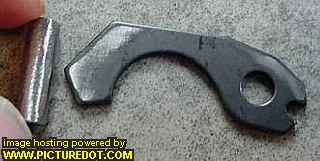
I honed this piece on both sides also, was a little rough on the edges so I did it anyway. This part is the safety bar that stops the barrel from opening when the hammer is cocked. Doesn't affect trigger pull at all. Also in this pic you can see a short pin that I made out of aluminum. This is needed to hold everything back together in the trigger assembly and should be a little smaller than the diameter of the frame pin. Pic #2 shows the trigger assembly held together with this pin.
You can put the hammer back in with no spring tension on it, then cock the spring after it's in. I used the back of a pen, pic below. Takes some messing around just to get the hammer back in, not a lot of room.
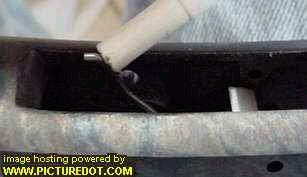
Put the trigger assembly together, with slave pin and re-insert it in the frame. This takes a little messing around until you've done it a few times. Should be used to getting it in there by now from taking it in and out a lot while honing to check your pull weight. The short false pin will be pushed out by the frame pin on re-assembly, like in the pic below.
Once you get these things apart you can see just how simple the design is, very few moving parts.

